
My current obsession is collecting seeds. It’s a wonderful way to spend the fall, in addition to checking out the beautiful colors, of course. You can find me spending weekends in my favorite areas with paper bags stuffed in my pockets and my foraging snips in my hand. But it takes a bit of watching before harvesting.
Collecting native seeds
Listen to The Fumbling Forager radio program.
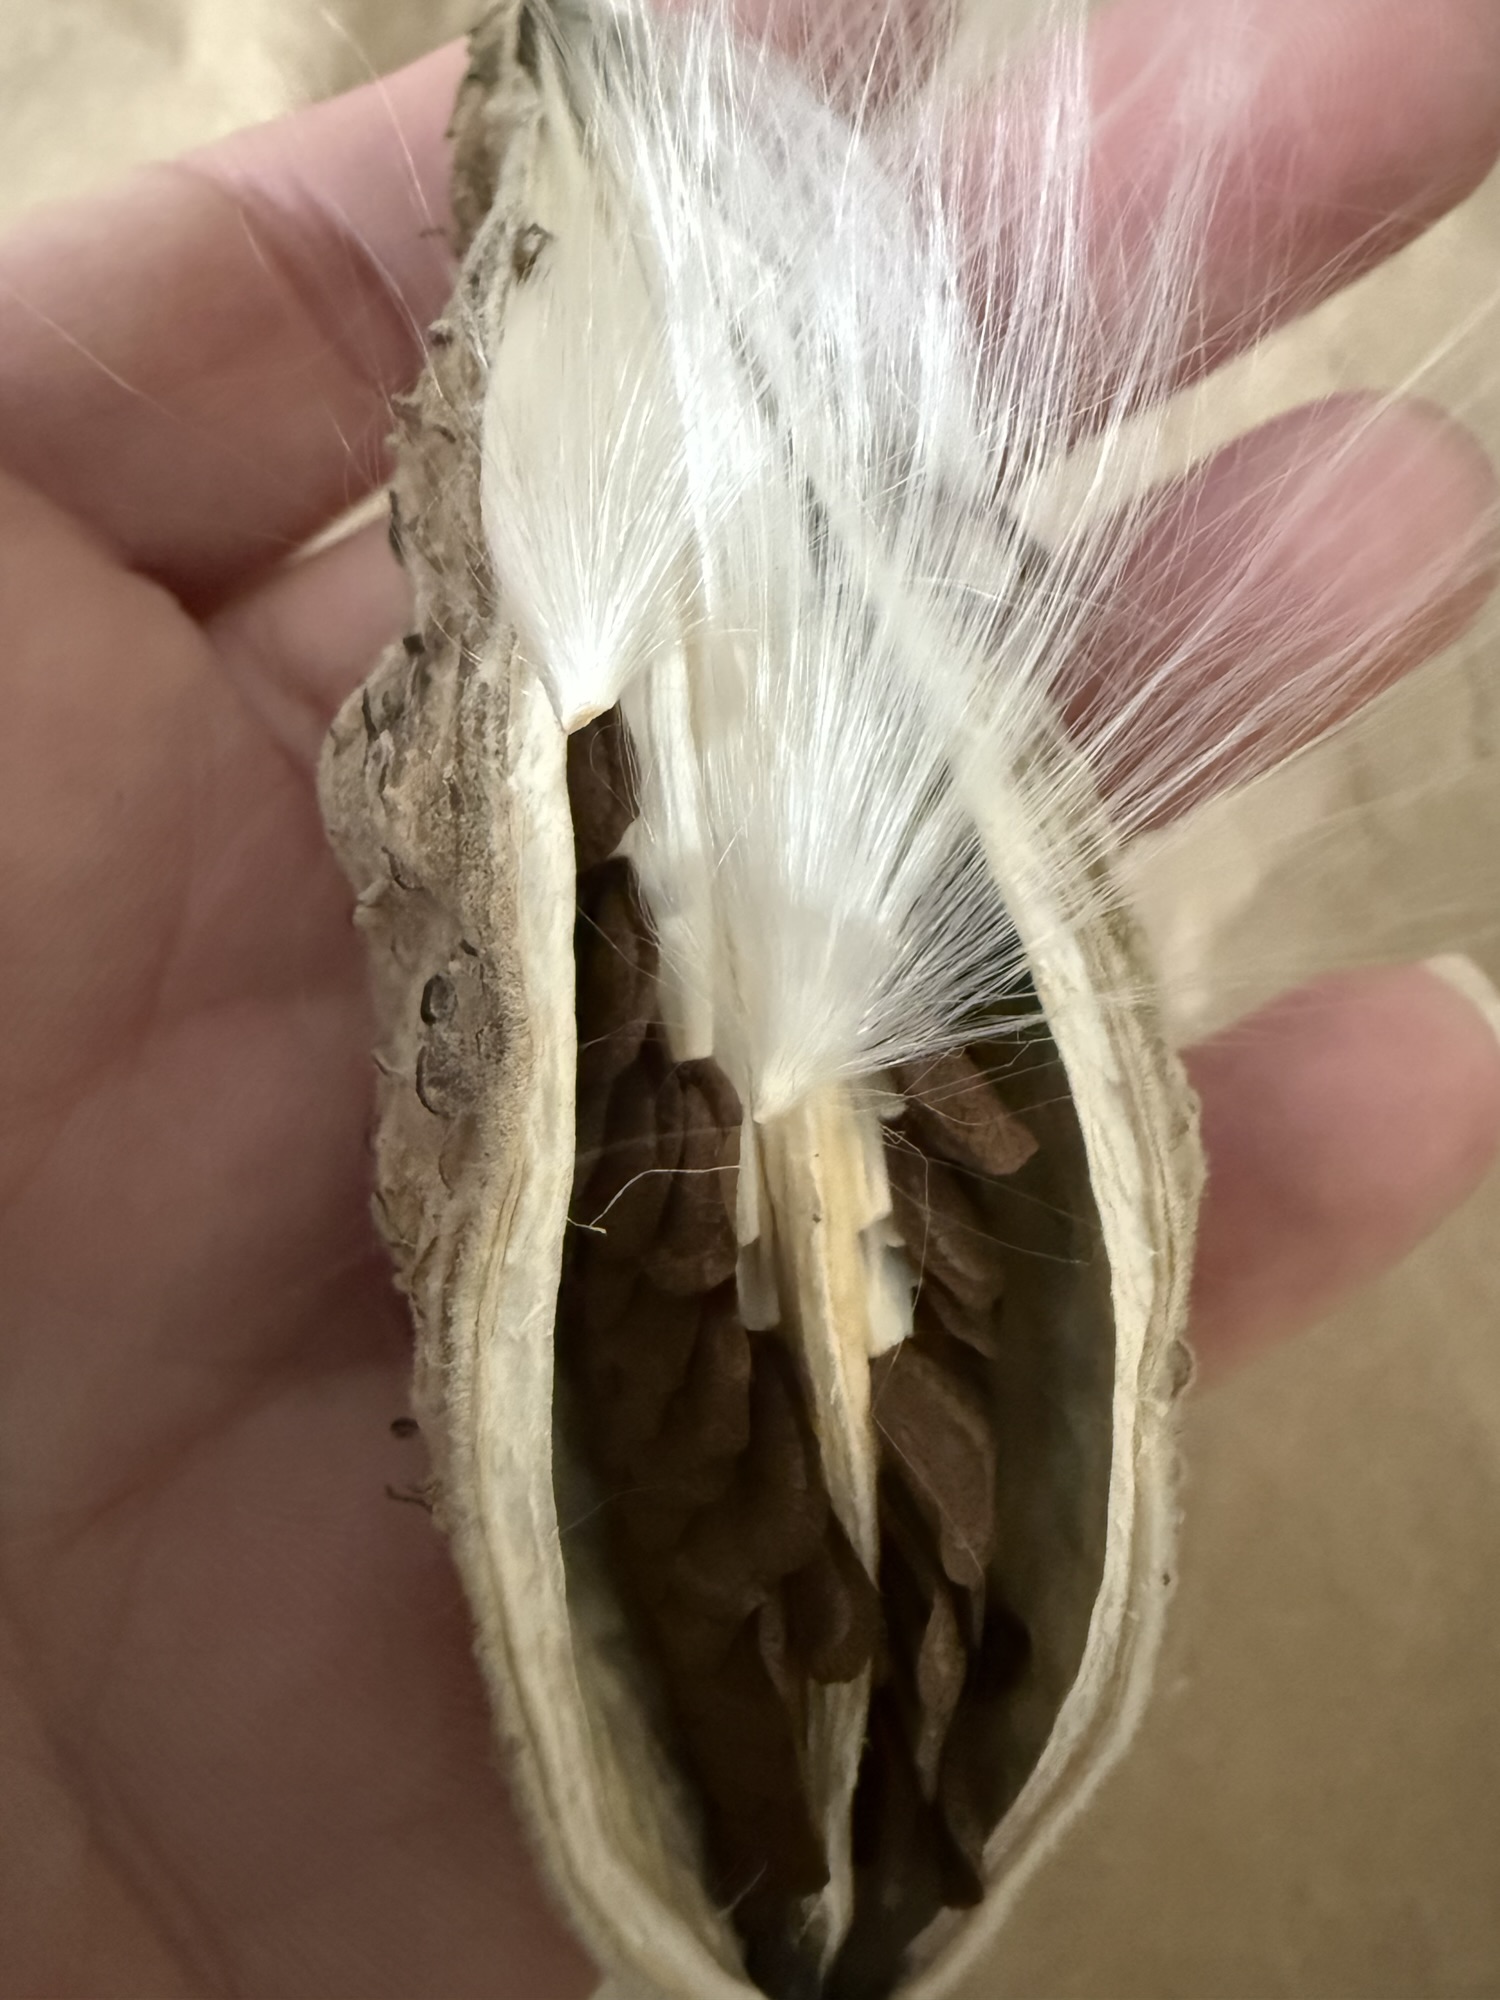
The trick is learning what mature seeds look like on the particular plant you’re collecting. A great plant to start with is common milkweed. It’s easy to identify, and it has a pod full of neatly packed seeds and a lot of fun fluff.
Upright prairie coneflower is another I’m seeking out right now. I usually end up with a handful of stuff that I’m not sure is seeds or chaff. But, we’ll get to how to figure that out.
Black-eyed Susan, wild bergamot and little bluestem are three more I’m seeking out this year. Here’s how I’m doing it.
Start with the plant, not the calendar
Seed maturity varies with species, location, and growing conditions. Even plants in the same patch may be ready at different times. Watch the plants themselves rather than relying on a collection date.
Identify each species before collecting, and check that it’s native to the area where you plan to grow it. Native to the United States doesn’t necessarily mean native to your region.
Collect only where you have permission. Take a small portion from an abundant population and leave plenty for the next generation of plants. Also remember that these seeds help feed wildlife through the winter, so leave enough for them, too.
Another good reason to collect a few seeds from several plants is that it provides more genetic diversity than collecting everything from one plant. And diversity is vital in nature.
Common milkweed (Asclepias syriaca)

Common milkweed is especially convenient to collect just as its pods begin to open, before the silky fluff carries the seeds away.
Gently press along a pod’s seam. A mature pod should open easily and have brown seeds inside. The pod itself may still have some green coloring, so its outside color alone doesn’t tell you whether the seeds are ready. If it doesn’t open easily or if the seeds are pale, leave it and check again later.
Inside a newly opened pod, the seeds and silk are still arranged in a compact bundle. Lift out that bundle, hold the silky end together and gently brush the seeds loose. This is much easier than separating them after the fluff has expanded. I learned this the hard way.
Another lesson I learned the hard way: Do this outside. I ended up with milkweed fluff all over the living room.
If you find a pod after it’s opened on its own, you can still gather the mature seeds that remain attached. You’ll just have more fluff to deal with.
Upright prairie coneflower (Ratibida columnifera)

Upright prairie coneflower, also called Mexican hat, produces seeds along its tall central cone. When the head has dried and the seeds release readily, hold a bag or shallow container underneath and gently rub or strip them from the cone. I use my fingernail and just gently rub it down the cone, which makes the seeds fall off.
What falls into your container may look like a collection of tiny flakes. That doesn’t mean it’s all chaff.

The seed-bearing fruits, called achenes, are flattened and roughly 2 millimeters long. They can appear gray-black, with a small fringe of hairs along an edge. You can see this with a jeweler’s loupe, if you have one. Each mature achene contains a seed and you plant the whole achene rather than trying to peel it open.
Spread a little of your collection on white paper and examine it with a magnifying glass. Look for repeated, similarly shaped pieces and compare them with a reliable close-up image of this species’ seeds.
You don’t have to remove every scrap of chaff for a home planting. Proper drying matters more than making the collection look like a commercial seed packet.
Black-eyed Susan (Rudbeckia hirta)
For black-eyed Susan, watch the central cone after the petals fade. You’ll want to wait until the cone is brown and dry.
Clip the mature head into a paper bag to take home, then later gently rub or crumble the dried head over a tray or plate to release the seeds. Some plant debris will come along with the seeds, but you can separate that out later.
The seed-bearing fruits are tiny, about 2 millimeters long, with four sides. A magnifying glass can help you pick them out from the surrounding material.
When collecting your black-eyed Susan seeds, leave some intact heads standing. Their seeds provide food for songbirds.
Wild bergamot (Monarda fistulosa)
After wild bergamot’s exquisite flowers fade, the rounded head retains the little tubes that held the flowers. They look a bit like wasp nests. The seeds develop inside those structures and are small, brown to black, and about 1.5 to 2 millimeters long.

Once the head is dry and brown, bend it over a paper bag and tap it. Mature seeds should fall into the bag. You can also clip a mature head and turn it upside down inside the bag.

Try the tapping method before cutting. If nothing comes out, check whether the seeds are still developing or whether the head has already emptied. You may have to go back a few times to get the timing right for collecting the seeds.
Little bluestem (Schizachyrium scoparium)
Native grasses belong in a seed collection, too. They’re so beneficial to the soil, and really should be planted more.
Little bluestem develops fluffy seed heads as the season progresses. Look for brown, mature seeds and heads that are beginning to release them. Hold a bag beneath a stem and gently strip the loose seed-bearing pieces into it. If they remain firmly attached, give that stem more time.
The attached hairs make the seeds look fluffy. You don’t need to perfectly clean the seeds. Just make sure they’re completely dry before storing them.
Bring them home dry, labeled, and ready for the next step
Collect after dew or rain has dried. Keep each species in its own paper bag, labeled with its common and scientific names, collection date, and location.
Spread the material in a shallow layer or leave it in an open paper bag in a dry, well-ventilated place to finish drying. Don’t seal freshly collected material in plastic, where trapped moisture can encourage mold. Once thoroughly dry, these seeds can be stored in labeled packets in a cool, dry location.
Before planting, look up each species’ germination requirements. Some seeds need a period of cold, moist conditions while others don’t. Some need light while others need to be buried. There are a lot of variables involved, but overall, I’ve found native plants very easy to grow from seed, probably because they’re what’s supposed to be growing here and that’s the way nature works.

About the Author:
Sabrina Halvorson is an award-winning journalist, author, and UMN Extension Master Naturalist. She serves as president of the Wild Ones Lake Agassiz Region seedling chapter, is appointed to the World Agriculture Forum, and was named the 2024 NAFB Farm Broadcaster of the Year. Learn more at sabrinahalvorson.com.
Leave a Reply